
This Mint Chocolate Cream Cheese Daifuku combines soft, chewy mochi with a creamy frozen filling of minty cream cheese and chocolate chunks. Refreshing, unique, and perfect for a make-ahead dessert!
Mochi vs Daifuku
When I first started making Japanese desserts, I often wondered—what’s the real difference between mochi and daifuku?
After a little digging (and lots of taste testing), I discovered that mochi is the simple, chewy glutinous rice cake base, while daifuku is a filled mochi, usually with something sweet inside.
The most traditional version is stuffed with anko (sweet red bean paste), but nowadays you’ll find daifuku filled with fruits, custards, chocolate, or even ice cream.
My Mint Chocolate Cream Cheese Daifuku Recipe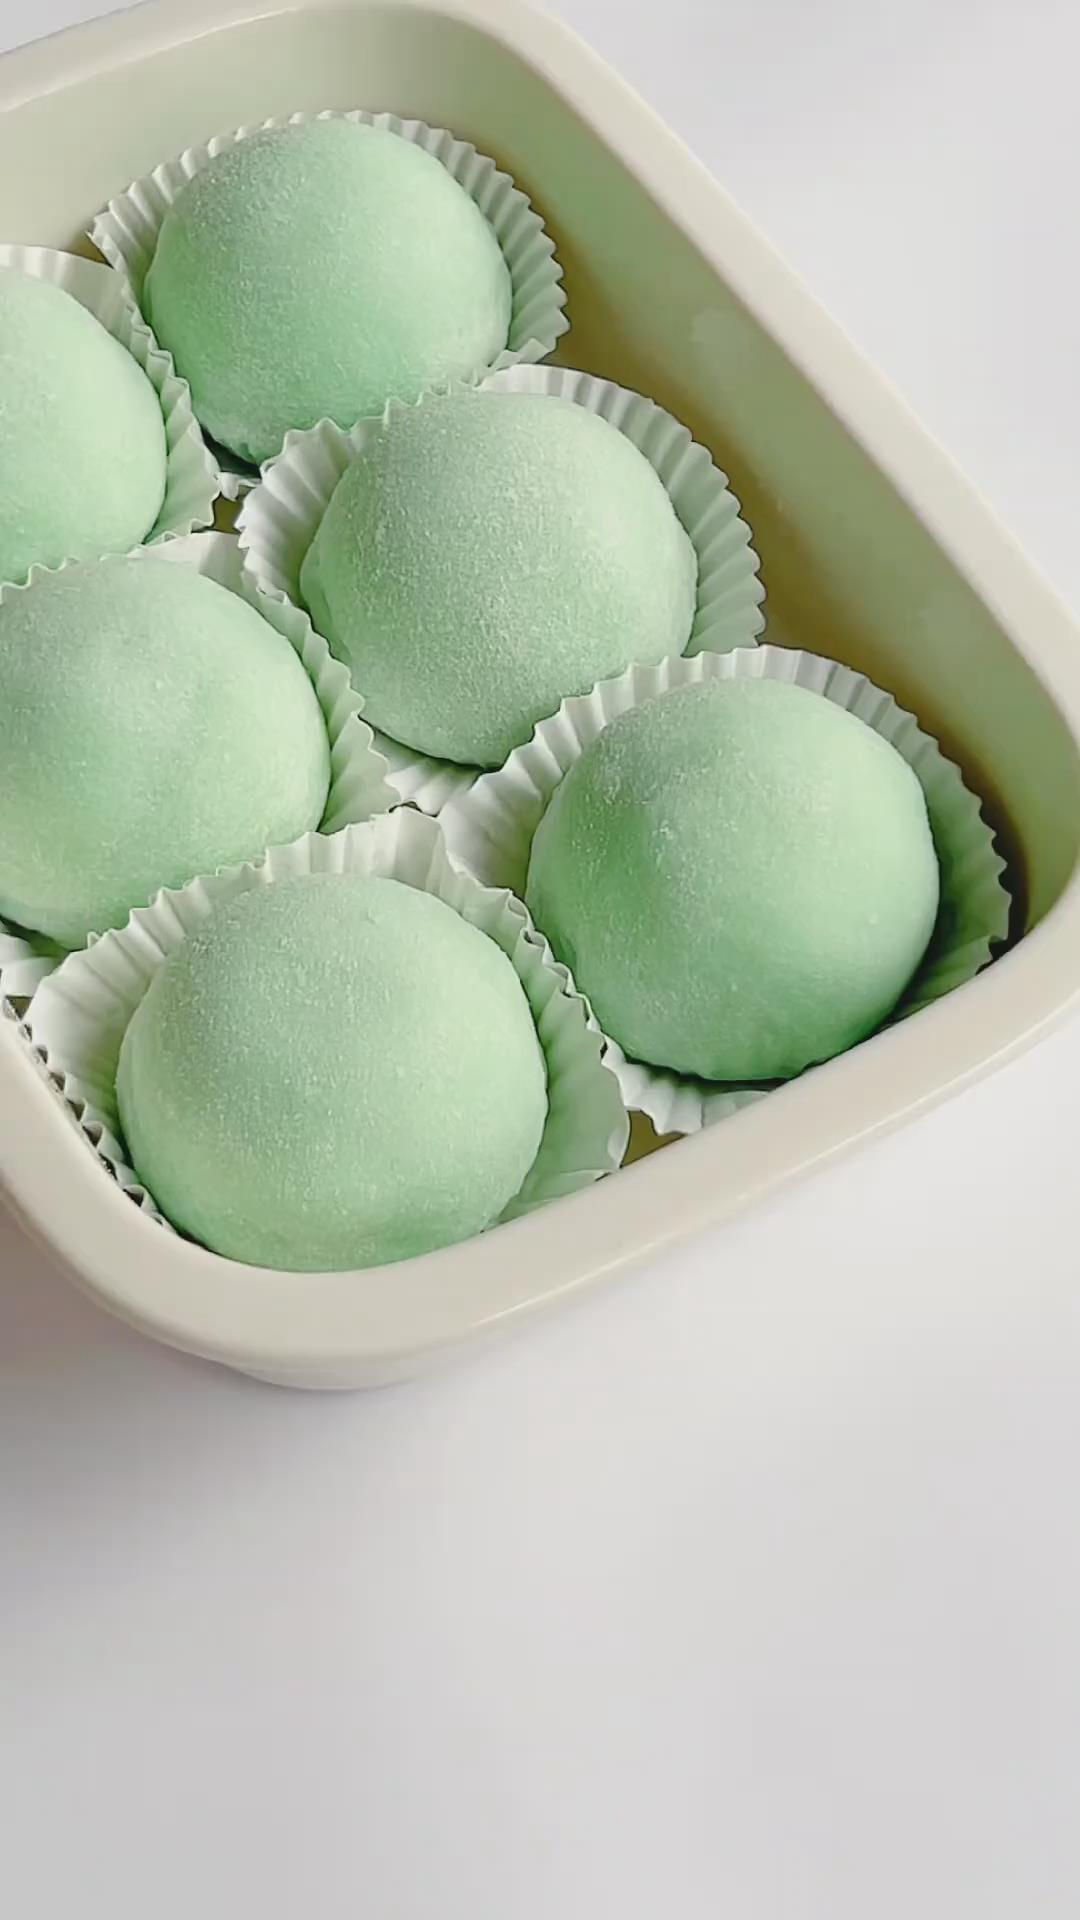
Personally, I love making mochi because it’s so versatile. Once you’ve mastered the soft, stretchy dough, the possibilities are endless—you can wrap it around fresh strawberries, create ice cream daifuku for summer, or experiment with creamy fillings like chocolate, matcha, or even cheesecake.
Some of my favorite creations include Osmanthus Mochi, the elegantly bitter-sweet Matcha Mochi Bites, the decadent Brown Sugar Pearl Mochi, the surprisingly savory-sweet Soft & Chewy Sweet Potato Mochi with Cheese, and the fun, fruity Watermelon Mochi Bites.
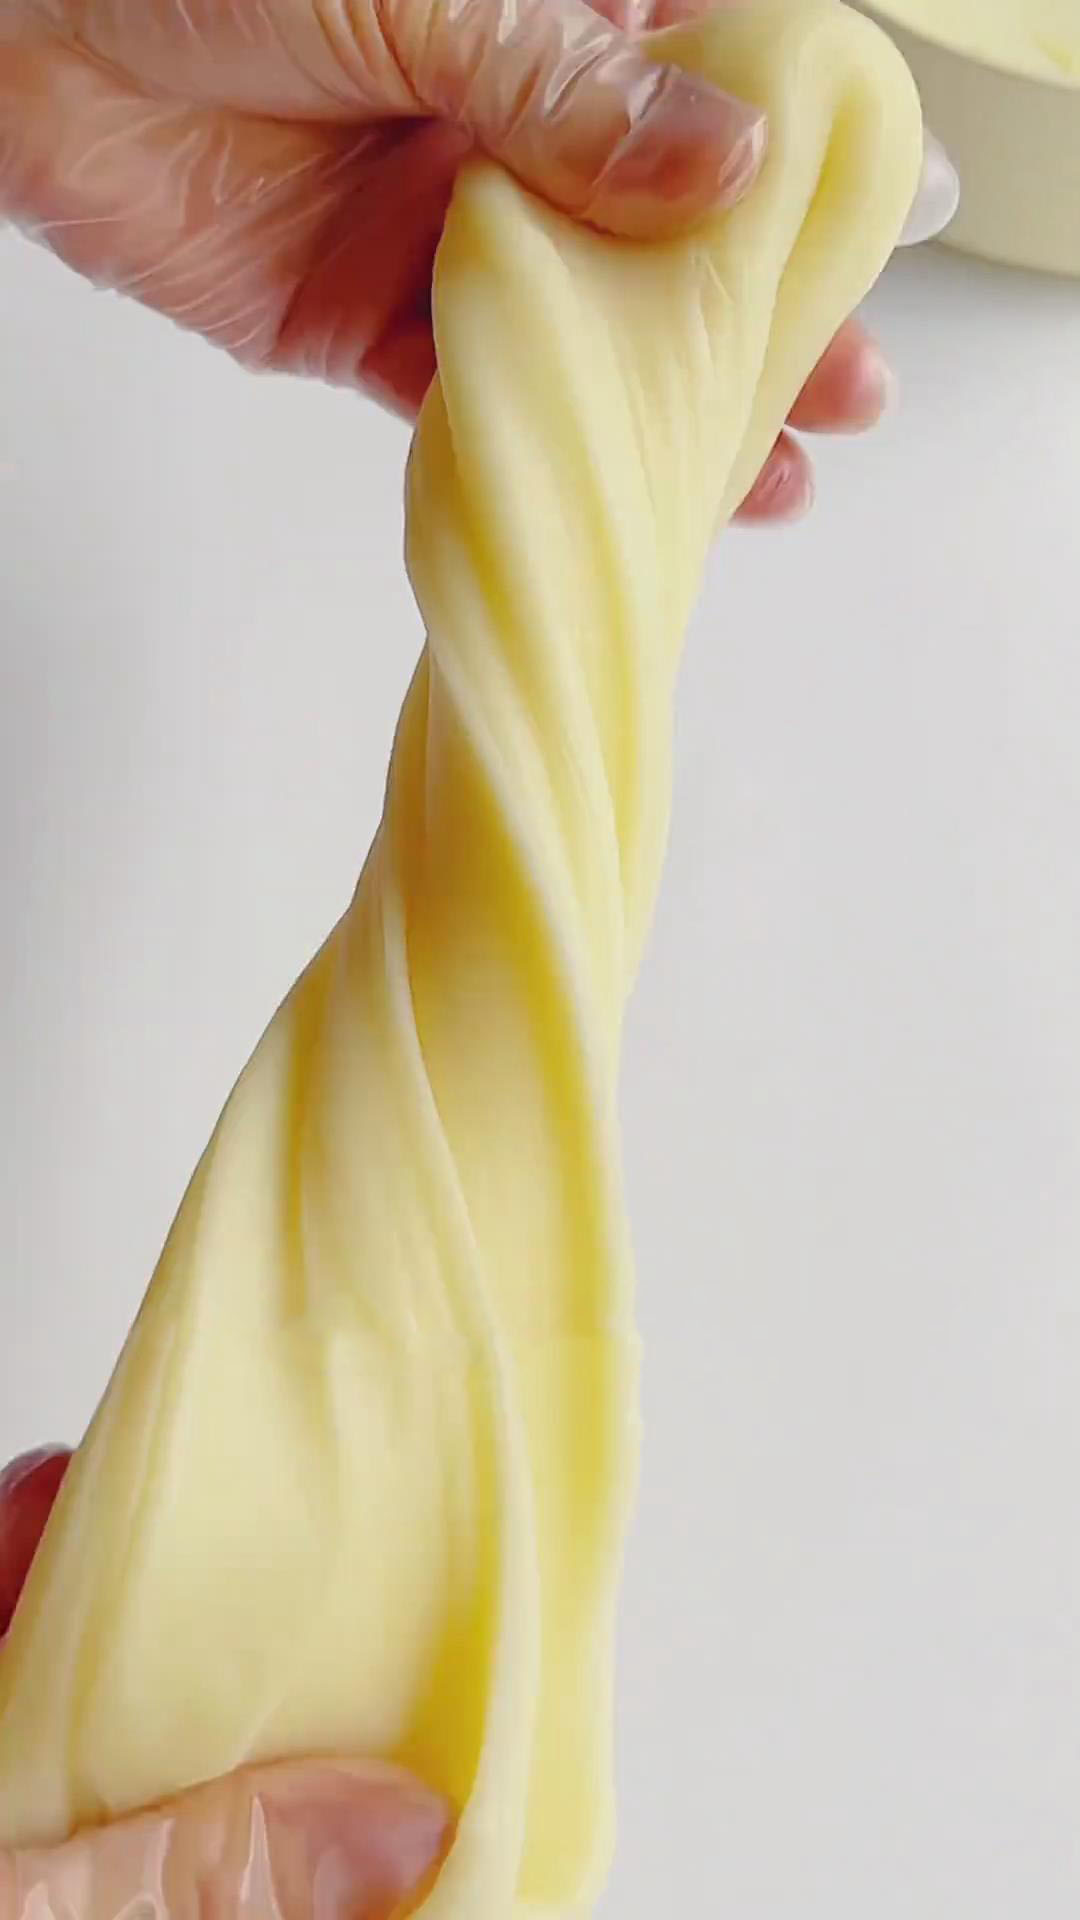
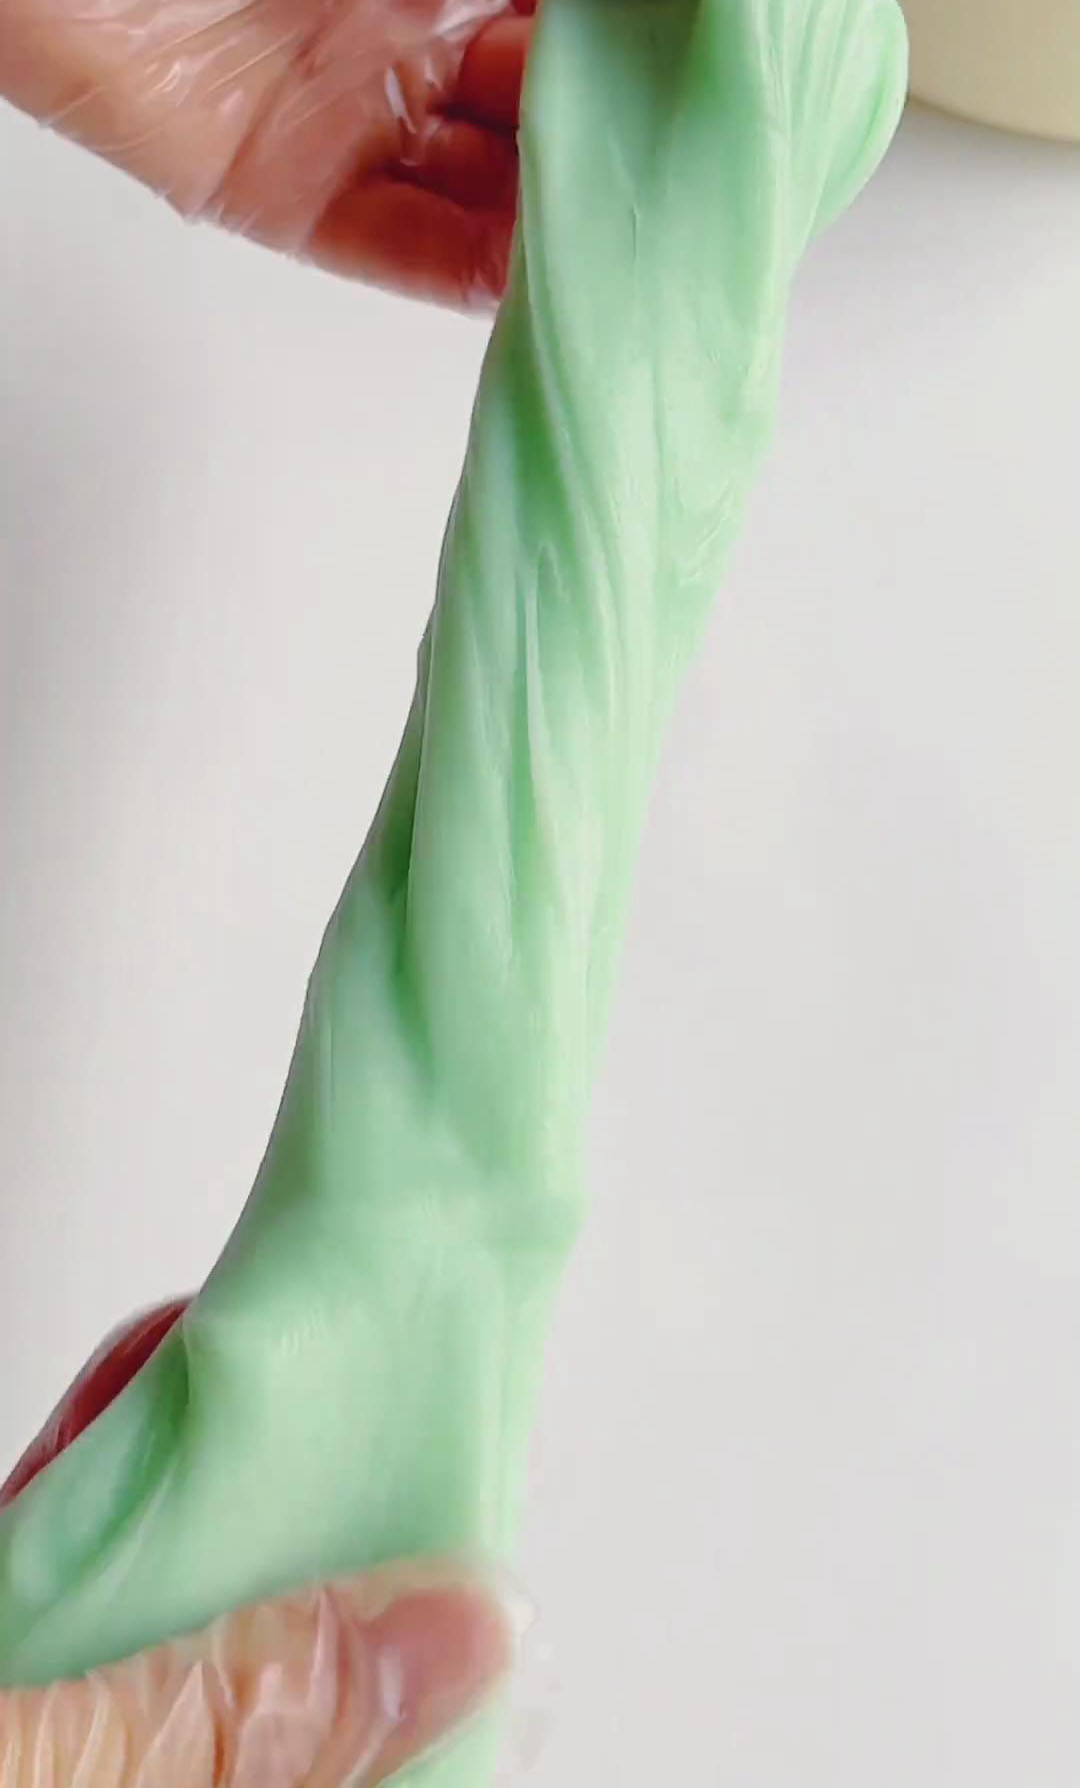
In this recipe, I added a hint of edible blue food coloring to the mochi skin to match the refreshing mint chocolate cream cheese filling.
It gives the daifuku a fun, eye-catching look. But don’t worry—it’s totally optional. If you prefer the classic snowy white mochi, just leave it out, and your daifuku will still taste amazing.

Why You‘ll Love This Recipe
- Refreshing flavor twist – Mint syrup pairs beautifully with cream cheese and chocolate.
- Chewy meets creamy – Soft mochi skin contrasts with smooth, frozen filling.
- Make-ahead friendly – The filling needs to freeze overnight, so you can prepare ahead.
- Beautiful presentation – With a touch of food coloring, it looks as good as it tastes.
Ingredients:
For the Mint Chocolate Cream Cheese Filling:
- 250g cream cheese, softened at room temperature
- 20g white sugar
- 25g mint syrup
- 190g heavy cream (animal-based, ≥30% fat), not whipped
- 30g dark or milk chocolate chunks
- Blue food coloring (optional)
For the Mochi Skin (Outer Layer):
- 90g glutinous rice flour (e.g., Mochiko)
- 20g cornstarch
- 30g white sugar
- 160g whole milk
- 20g unsalted butter, softened
- Blue food coloring (optional)
- Toasted glutinous rice flour, for dusting
Note on Ingredients:
- Cream Cheese: It is crucial that the cream cheese is very soft at room temperature to ensure a perfectly smooth filling without any lumps.
- Mint Flavor: Mint syrup provides the best flavor. If you must substitute, use 10g of pure mint extract mixed with 15g of water.
- Chocolate: Use high-quality baking chocolate chopped into small chunks. Chocolate chips can be used, but they may contain stabilizers that affect melting.
- Glutinous Rice Flour: This is also called sweet rice flour (e.g., Mochiko brand). Do not substitute with regular rice flour, as it will not have the same chewy texture.
- Toasted Rice Flour: This is essential for handling the sticky mochi dough. To make it, simply toast regular glutinous rice flour in a dry pan over low heat until it is lightly golden and smells nutty.
Instructions
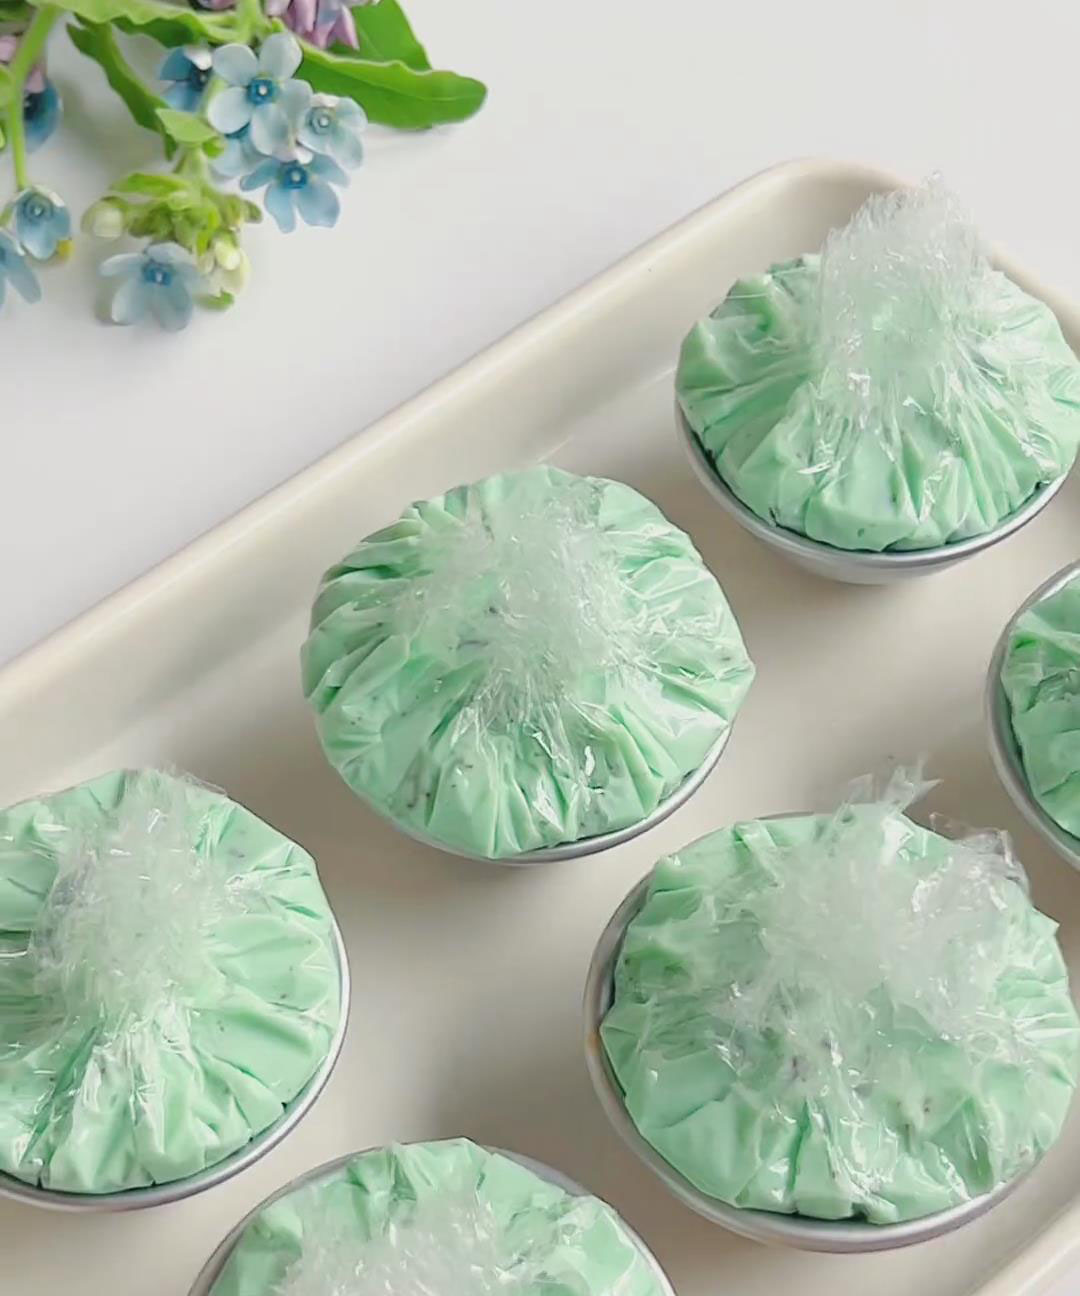
1. Prepare the Mint Chocolate Cream Cheese Filling (with freezing):
In a large bowl, whisk softened cream cheese, sugar, and mint syrup until smooth.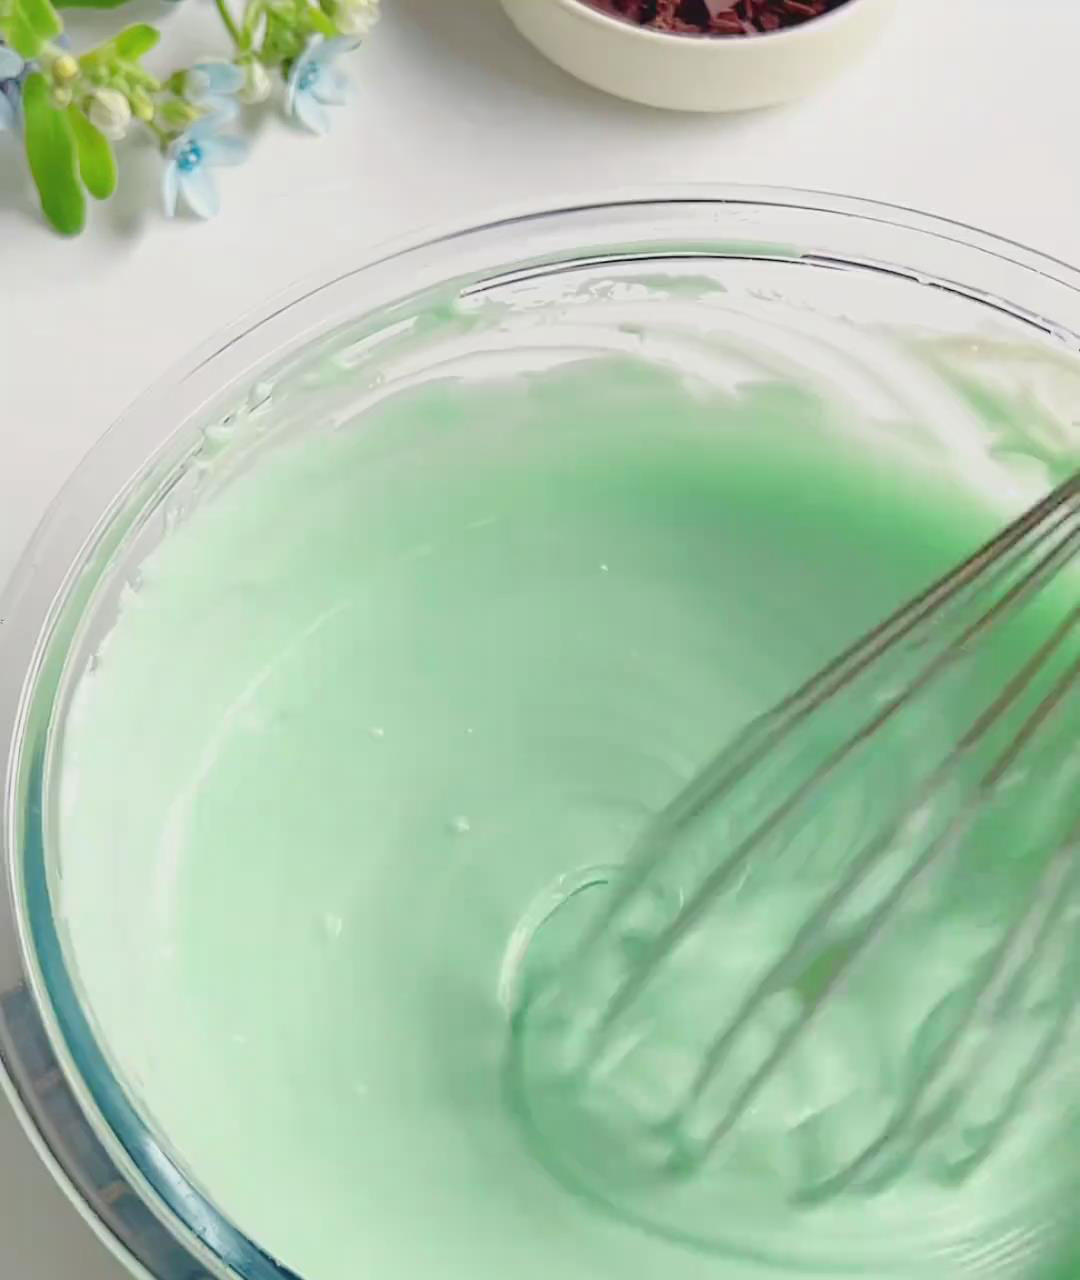
Add food coloring (optional) and mix until evenly colored. Fold in chocolate chunks.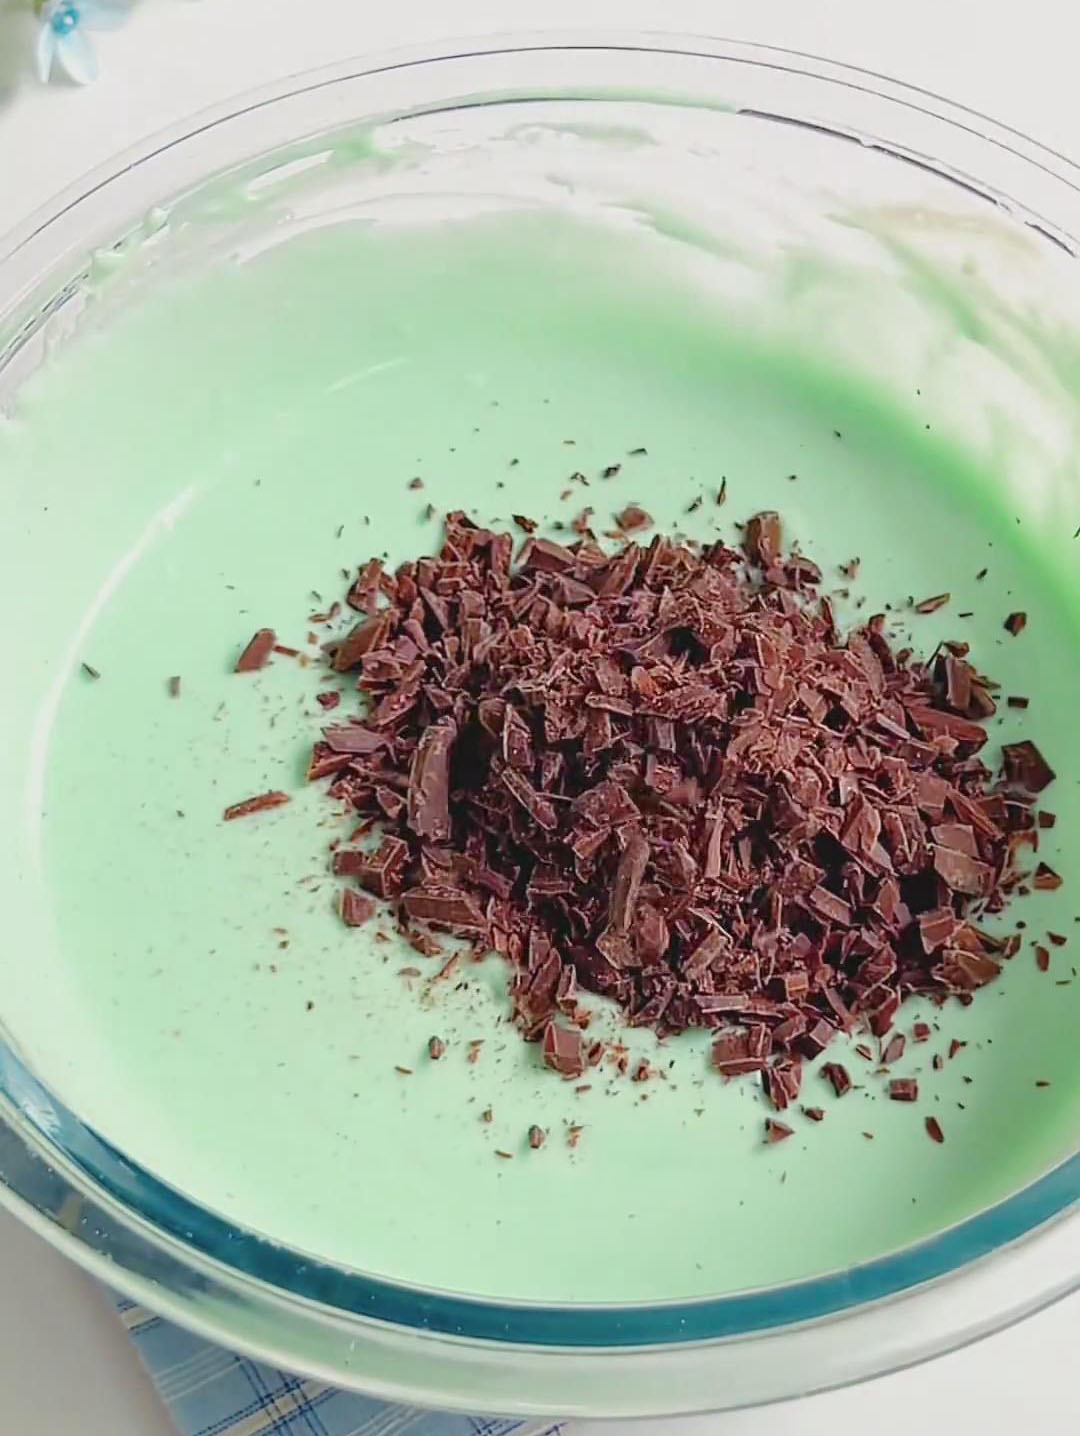
Transfer to a piping bag, pipe into a mold lined with plastic wrap, and freeze overnight until firm.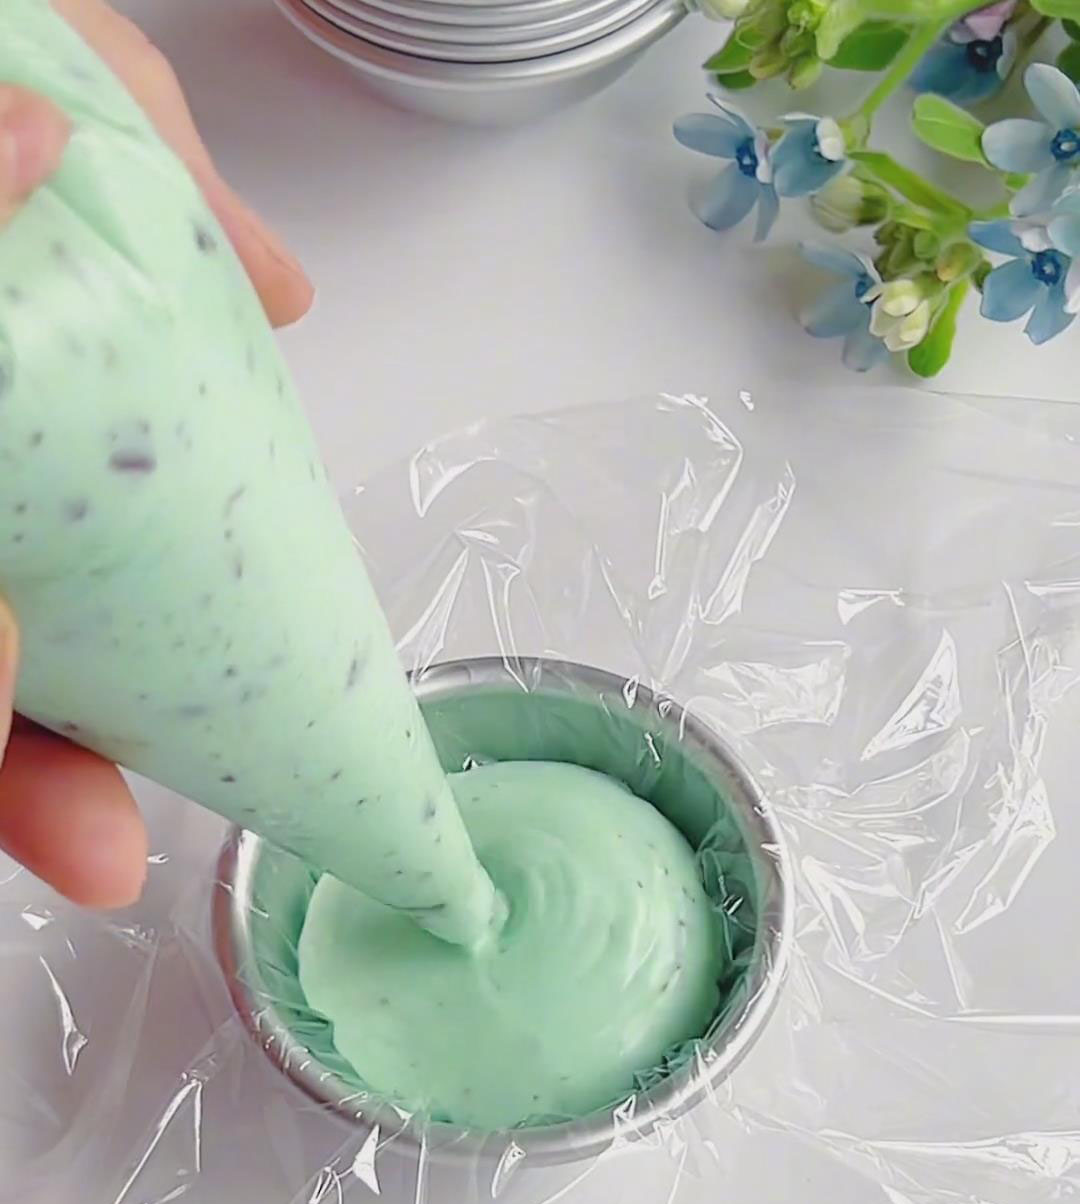
2. Make the Mochi Dough:
In a bowl, whisk together glutinous rice flour, cornstarch, and sugar. Gradually add milk, mixing until smooth. Strain once to remove lumps.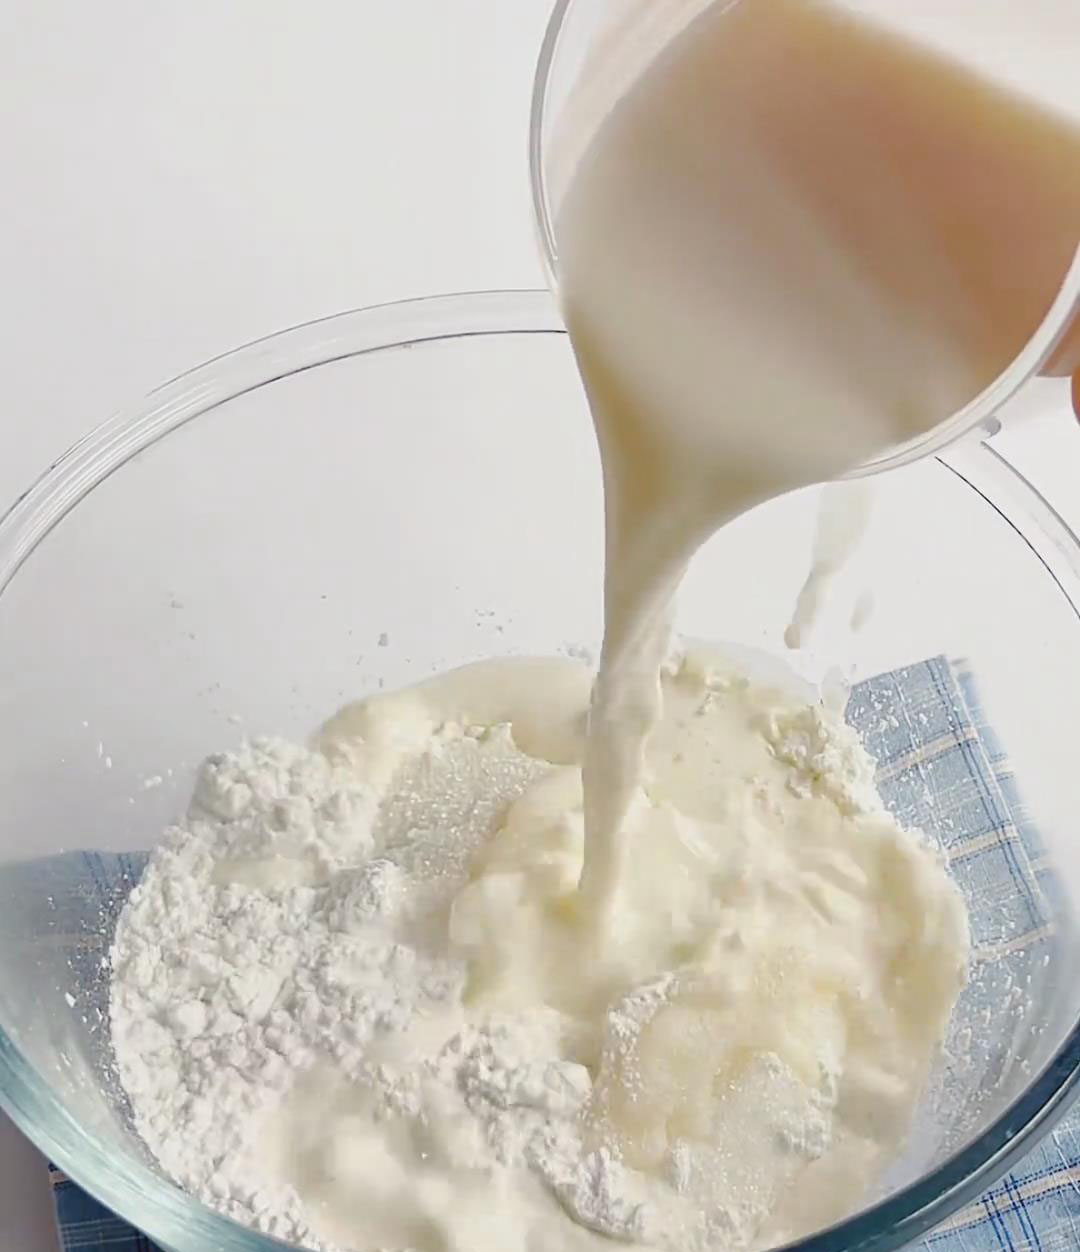
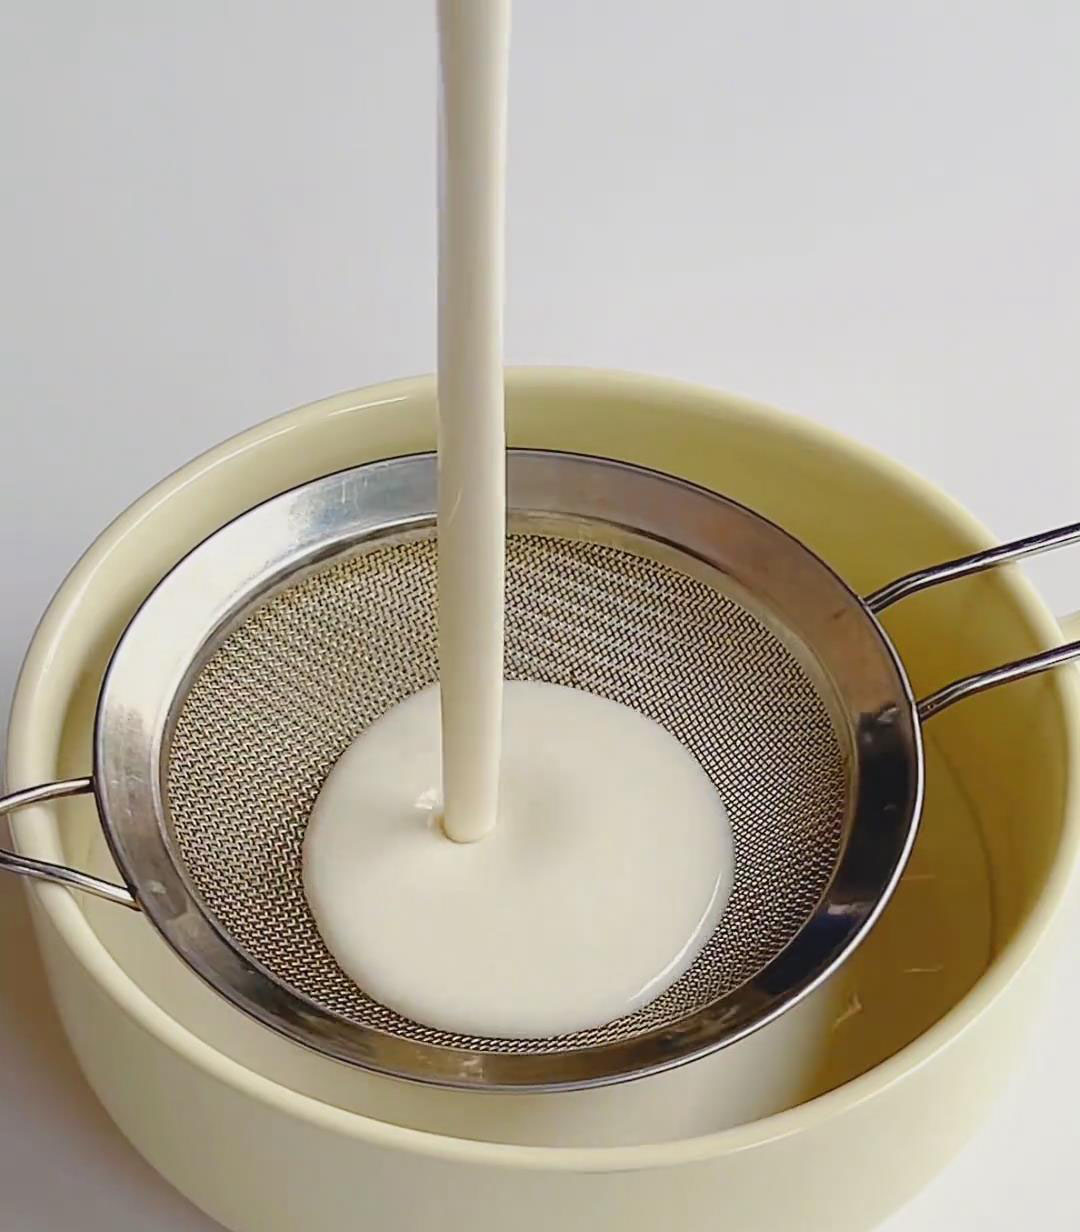
Pour into a heatproof container, cover with plastic wrap, poke 10–15 holes, and steam for 25 minutes over medium heat until fully set.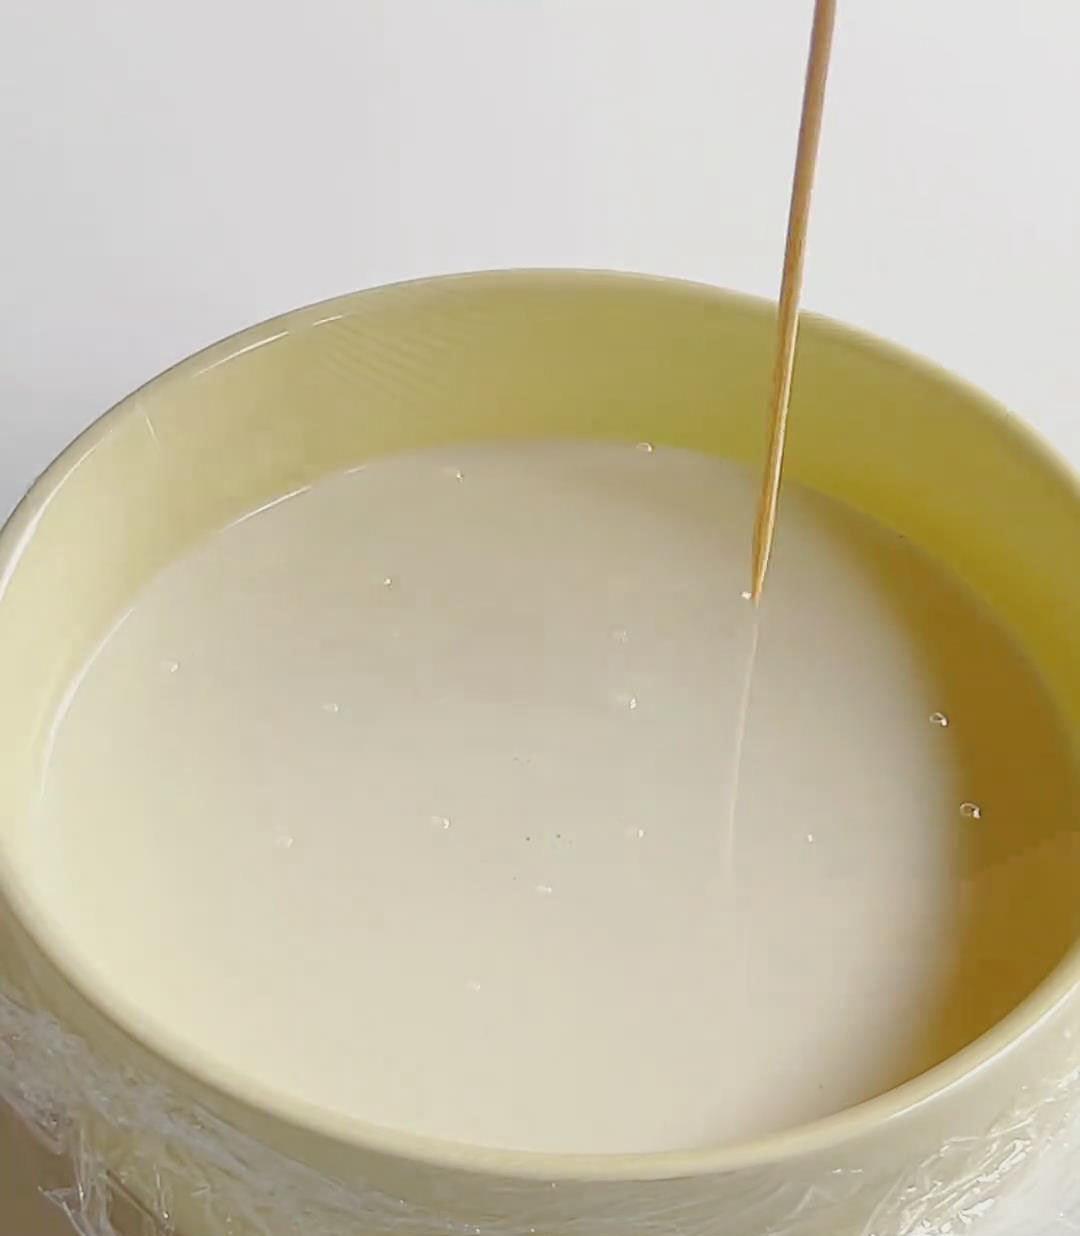
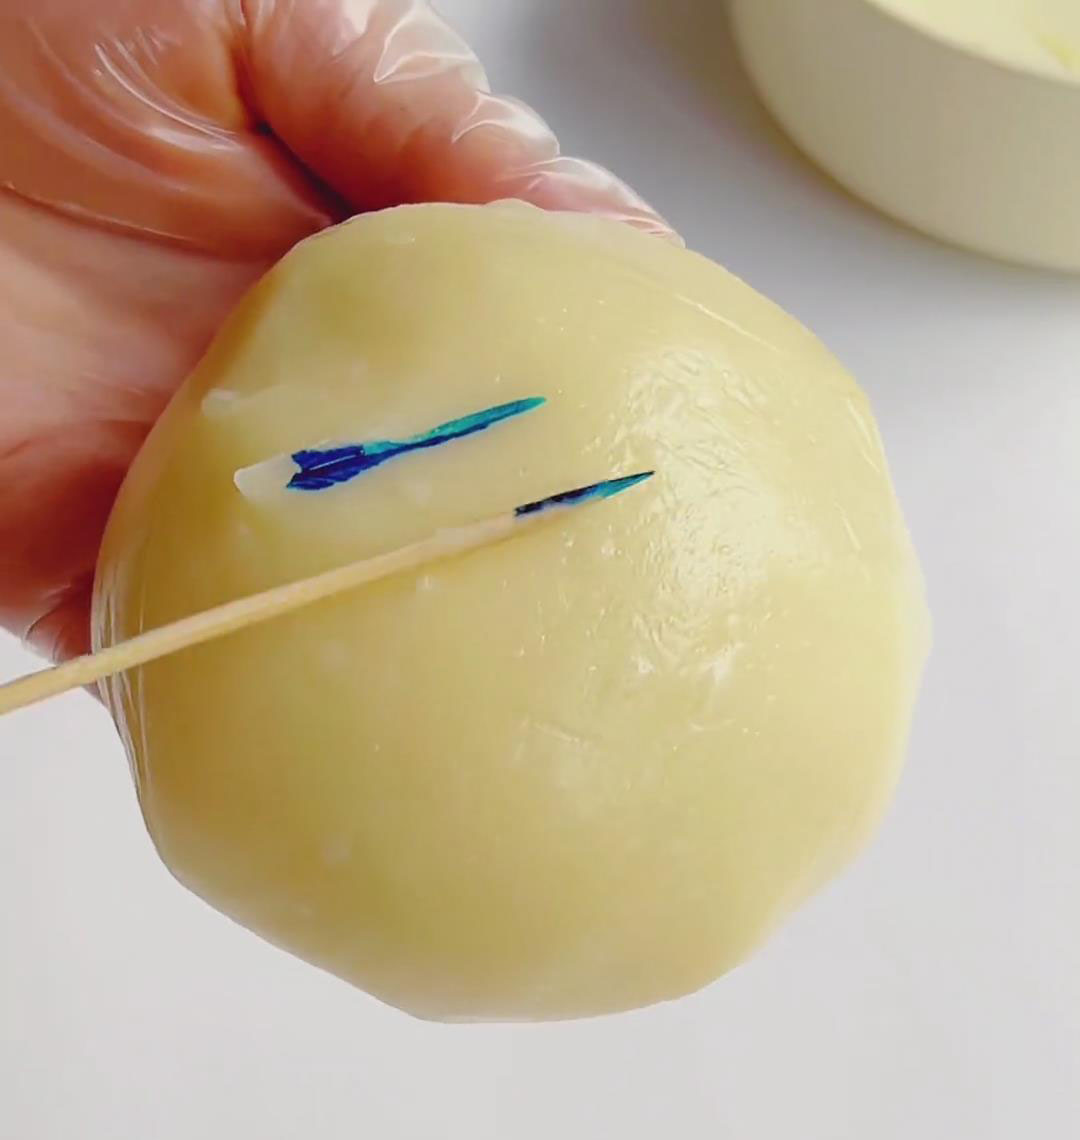
While hot, mix in softened butter. Once cooled to about 40°C, knead until smooth and stretchy. Add food coloring (optional) and knead until evenly blended.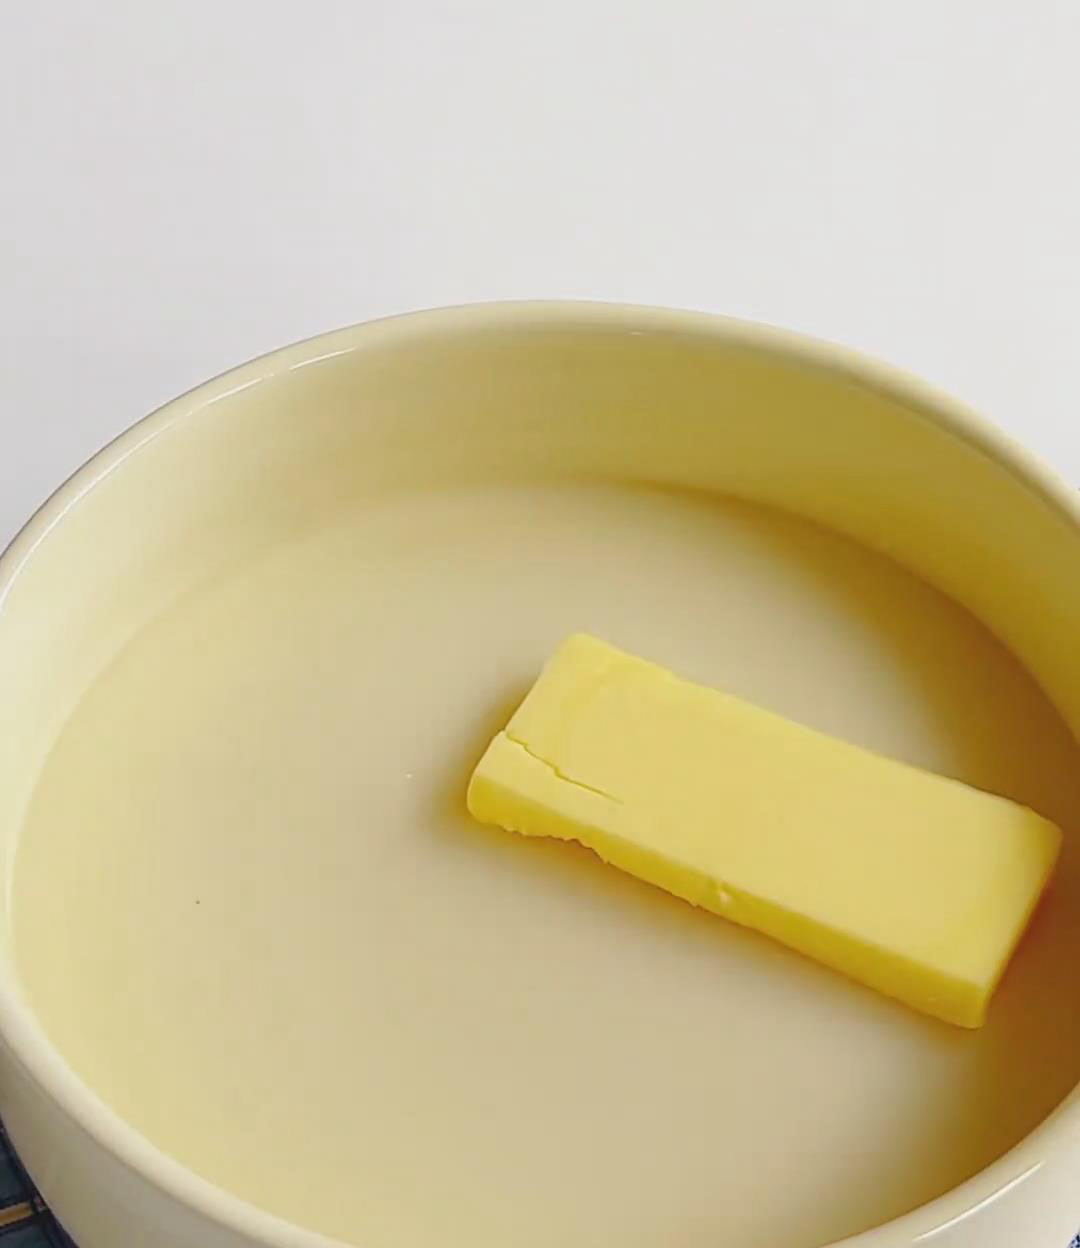
3. Assemble and Shape:
Divide mochi dough into 50g portions. Dust a surface with cooked glutinous rice flour. Roll each into a 10cm round, thinner at edges, thicker in center.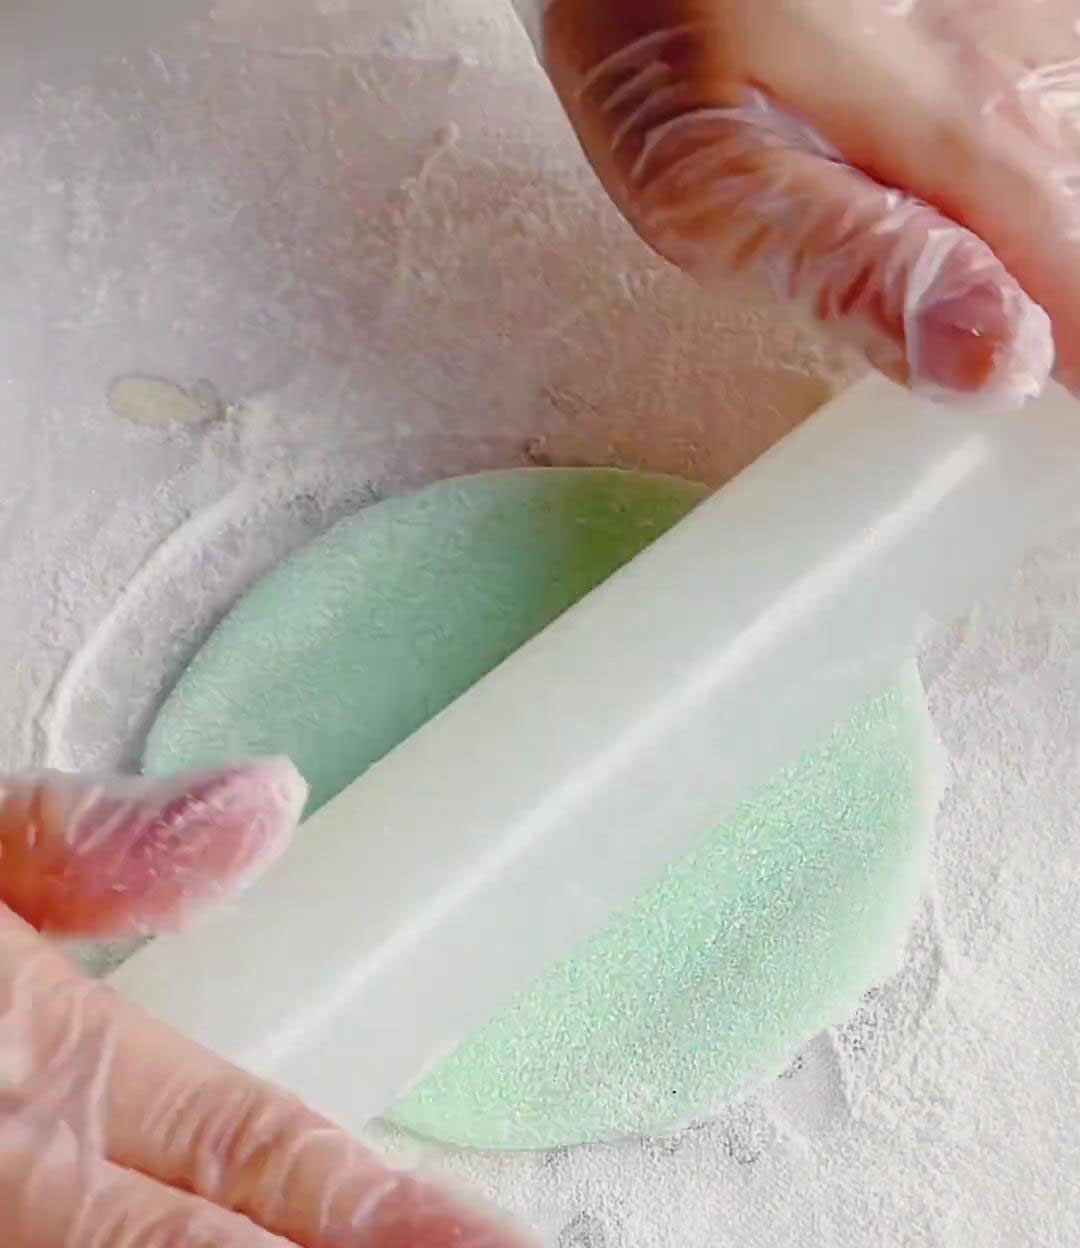
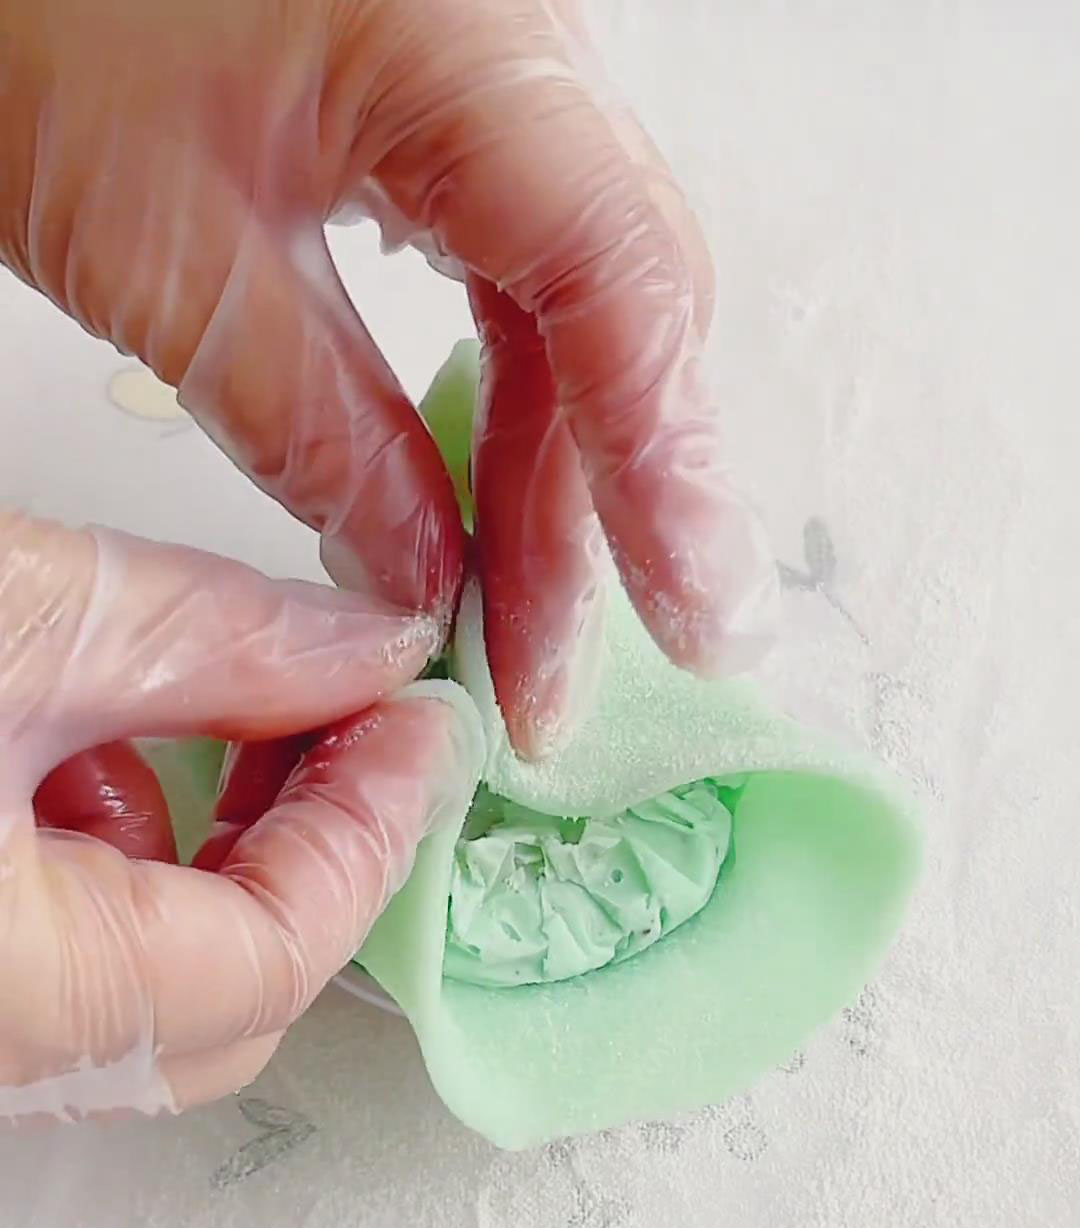
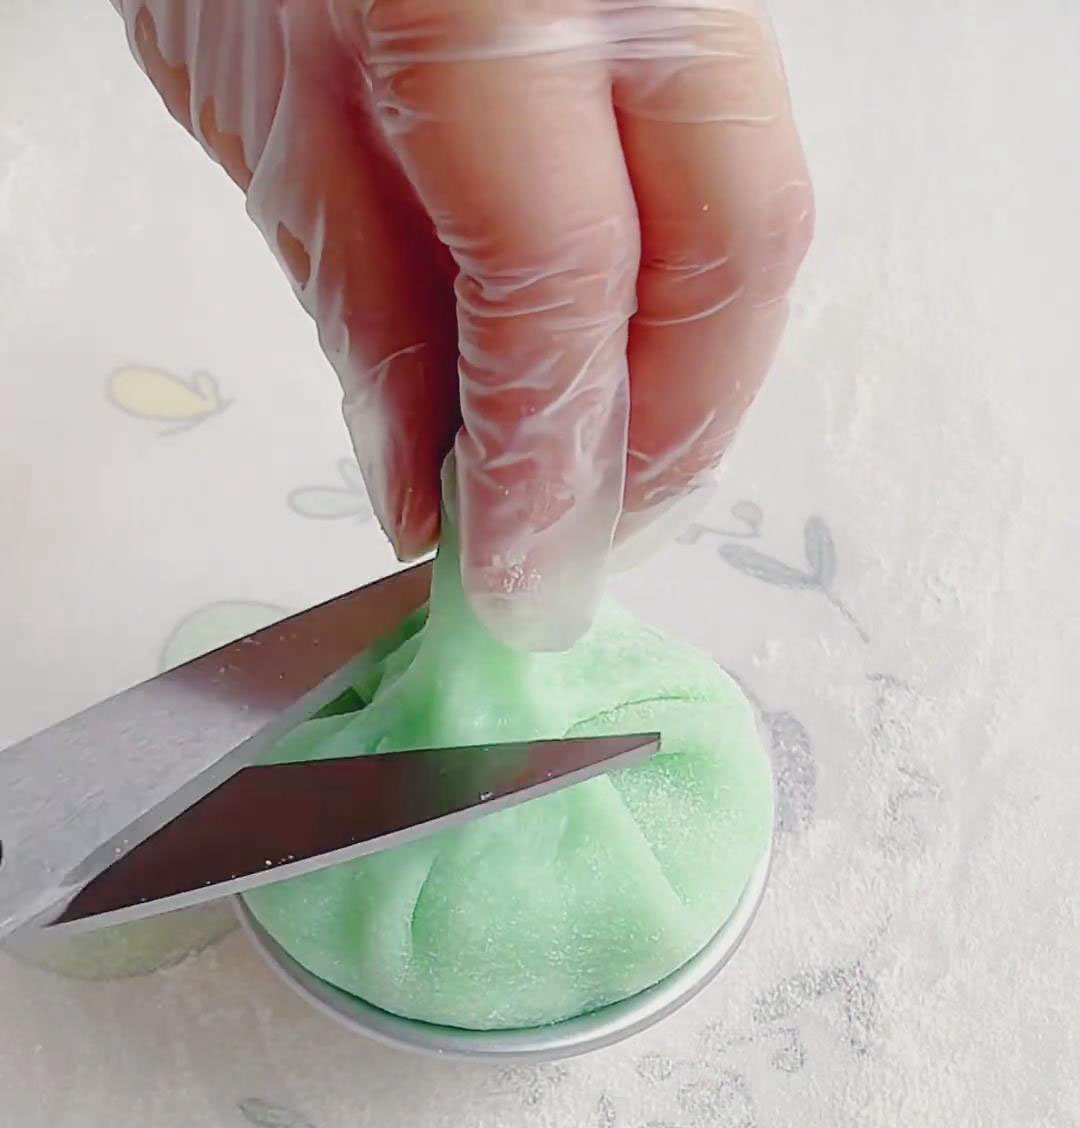
Place the rolled-out mochi wrapper over the mold, then remove the frozen mint chocolate cream cheese filling (peel off the plastic wrap) and set it in the center. Gather the edges of the mochi toward the middle and pinch them together gently to seal. Trim off any excess mochi dough with scissors.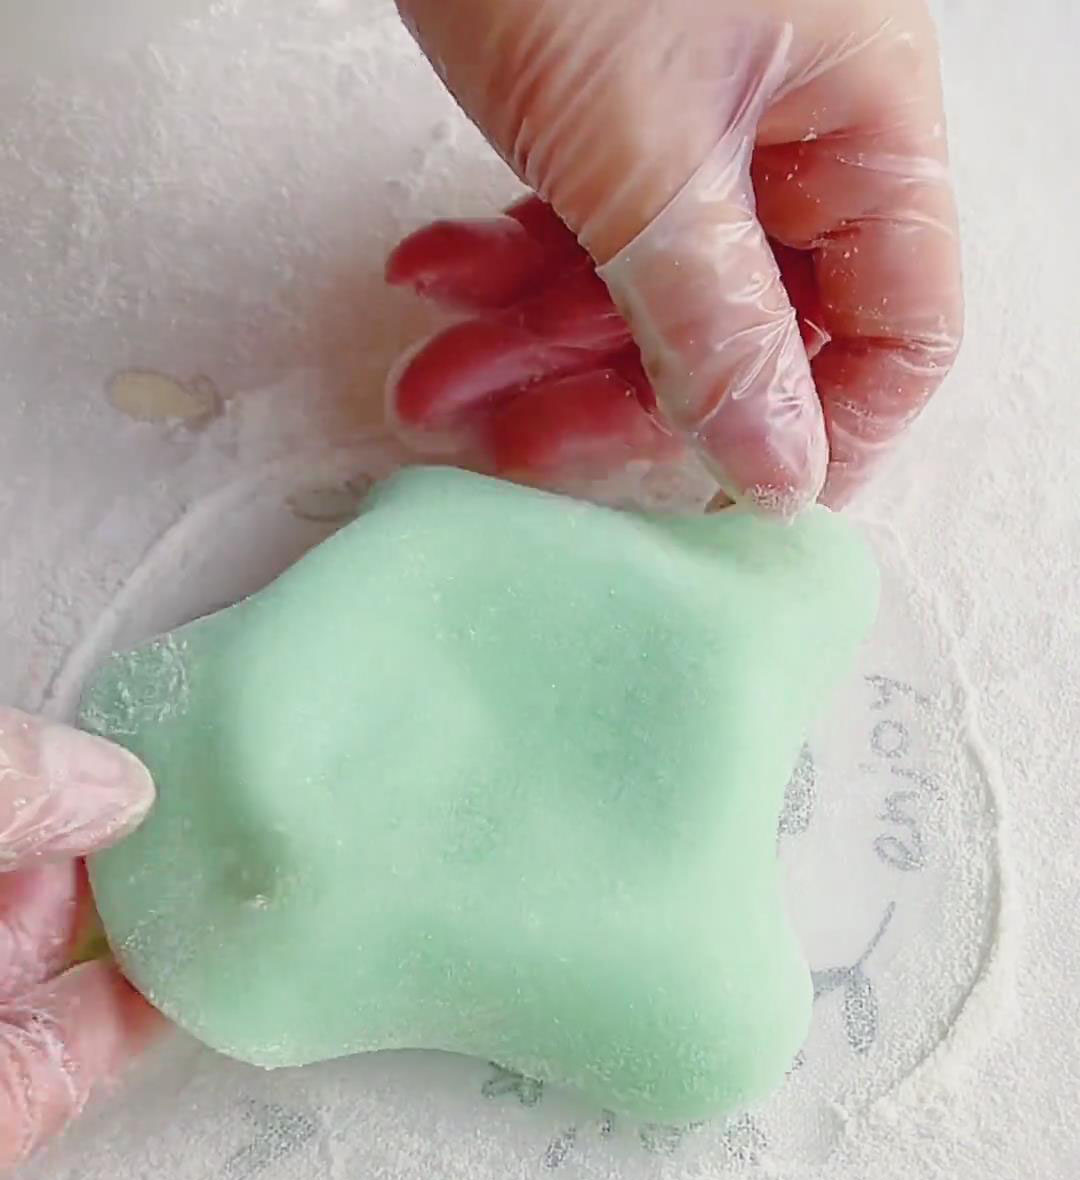
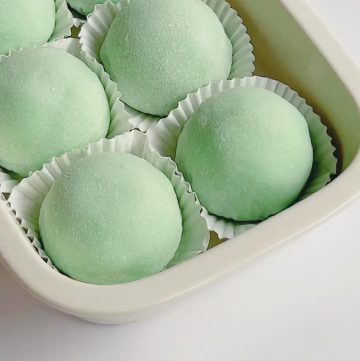
Evenly dust the surface of the finished mochi with cooked glutinous rice flour (to prevent sticking). Invert the mold and gently release the daifuku. The mochi is ready to serve, but I recommend chilling it before eating for a texture that’s closer to ice cream.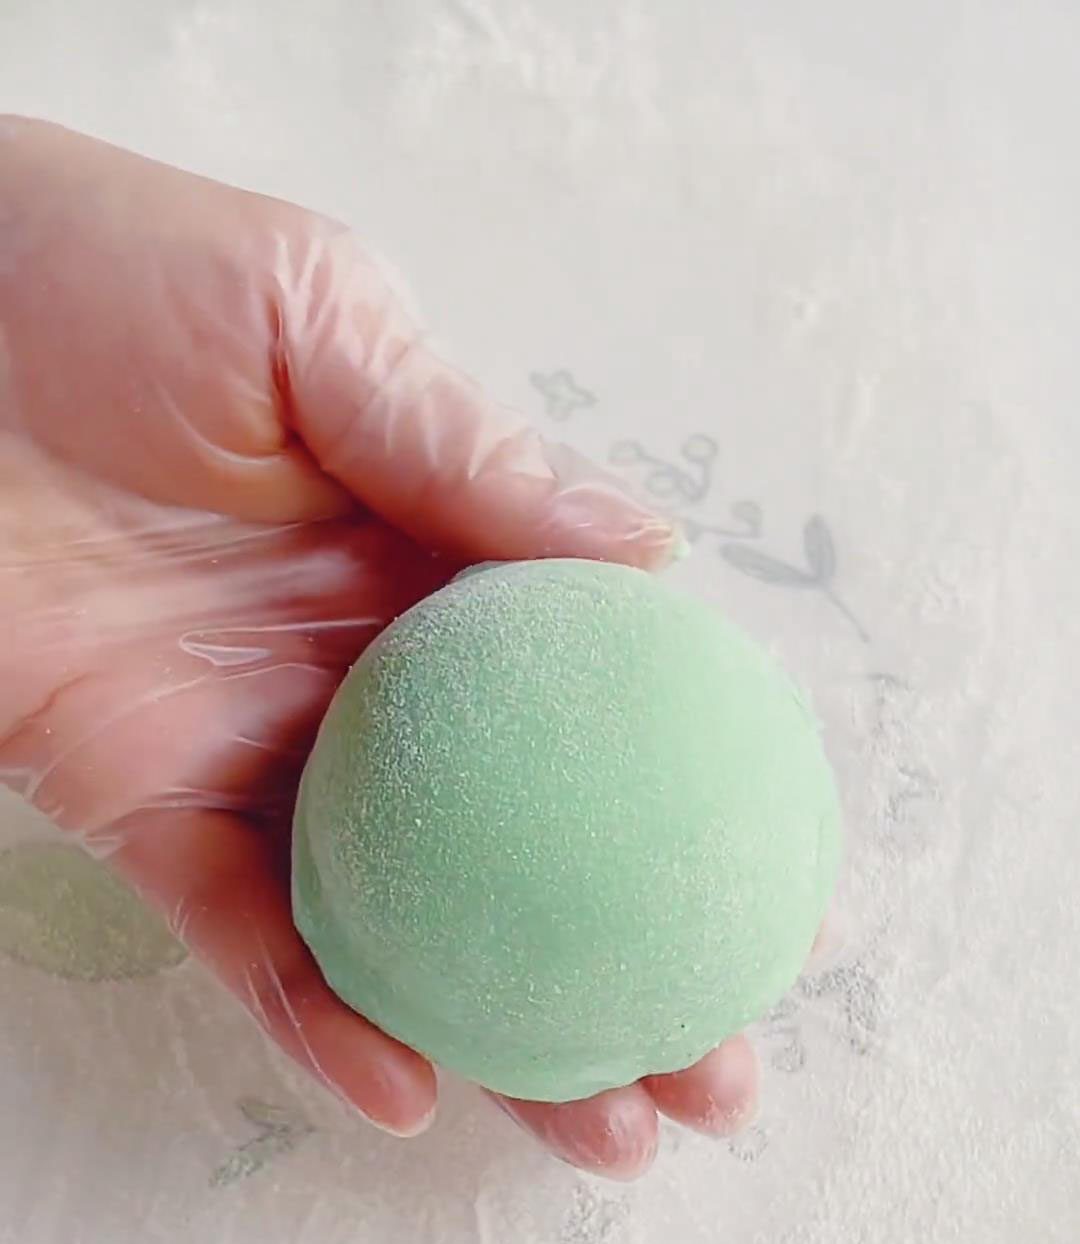
Frequently Asked Questions
Q: Can I skip the food coloring?
A: Absolutely, it’s only for presentation. The flavor stays the same without it.
Q: How long can I store these daifuku?
A: Store in an airtight container in the fridge for up to 2 days. For the best texture, enjoy them within 24 hours.
Q: Can I use matcha instead of mint?
A: Yes! Replace mint syrup with a matcha mixture, and it becomes a Matcha Chocolate Cream Cheese Daifuku.
Chewy Mint Chocolate Mochi with Cream Cheese Filling
Ingredients
For the Mint Chocolate Cream Cheese Filling:
- 250 g cream cheese softened at room temperature
- 20 g white sugar
- 25 g mint syrup
- 190 g heavy cream animal-based, ≥30% fat, not whipped
- 30 g dark or milk chocolate chunks
- Blue food coloring optional
For the Mochi Skin (Outer Layer):
- 90 g glutinous rice flour e.g., Mochiko
- 20 g cornstarch
- 30 g white sugar
- 160 g whole milk
- 20 g unsalted butter softened
- Blue food coloring optional
- Toasted glutinous rice flour for dusting
Instructions
Prepare the Mint Chocolate Cream Cheese Filling (with freezing):
- In a large bowl, whisk softened cream cheese, sugar, and mint syrup until smooth.
- Add food coloring (optional) and mix until evenly colored. Fold in chocolate chunks.
- Transfer to a piping bag, pipe into a mold lined with plastic wrap, and freeze overnight until firm.
Make the Mochi Dough:
- In a bowl, whisk together glutinous rice flour, cornstarch, and sugar. Gradually add milk, mixing until smooth. Strain once to remove lumps.
- Pour into a heatproof container, cover with plastic wrap, poke 10–15 holes, and steam for 25 minutes over medium heat until fully set.
- While hot, mix in softened butter. Once cooled to about 40°C, knead until smooth and stretchy. Add food coloring (optional) and knead until evenly blended.
Assemble and Shape:
- Divide mochi dough into 50g portions. Dust a surface with cooked glutinous rice flour. Roll each into a 10cm round, thinner at edges, thicker in center.
- Place the rolled-out mochi wrapper over the mold, then remove the frozen mint chocolate cream cheese filling (peel off the plastic wrap) and set it in the center. Gather the edges of the mochi toward the middle and pinch them together gently to seal. Trim off any excess mochi dough with scissors.
- Evenly dust the surface of the finished mochi with cooked glutinous rice flour (to prevent sticking). Invert the mold and gently release the daifuku. The mochi is ready to serve, but I recommend chilling it before eating for a texture that's closer to ice cream.
Leave a Reply